Aquaponics – Fish and Gardening Enthusiasts Unite!
|I have always grown up having a garden. Living in Texas and the Midwest, these were easy to maintain, and I always managed to have bountiful crops and lots of herbs at my disposal. I tried to continue this tradition in Arizona, only to find that my green thumb turned a horrible shade of brown (except with cactus). To grow plants in the desert, you need to be an avid waterer. With my busy schedule, let’s face it, this, I am not.
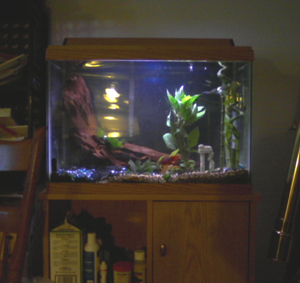
So I turned to waterscaping with lots of little fish, delighting in my ability to create a mini ecosystem that wouldn’t die a horrible death should I forget it for a day or two. All was good in the world.

What you don't see is me behind the camera making fishie faces at the fishies.
Again, I turned to the internet to research methods of container gardening. I like raised beds, but, as I am now living in an apartment with no nearby access to a hose, those didn’t seem practical. Hydroponics seemed a bit more feasible, but I am not a chemist and felt that monitoring the nutrient levels would be too much for this scientist-by-hobby-only type of gal. After all, if I was going to have that much space taken up, I might as well get a larger fish tank.
That last thought sparked an idea, so I went digging. I started where every internet-savvy person would: Wikipedia. Let’s just say that Wikipedia has a phenomenal hydroponics article (Dalek aeroponics tripod!). Aeroponics was more my style, but I didn’t want to pay $150 for a table-top system that would only get me a square foot of growing space. I’d build my own, first!
I scrolled down to the related articles and accidentally clicked on “Aquaponics.” I was quite excited to find that I could put my fish hobby to use and get something for myself out of it. The idea is that the fish fertilize the water, which you pump into your growing bed, where the plants filter the usable nutrients (which are actually toxic to the fish) out of the water, returning the cleaned water back to the fish.
Now, there are a bajillion different designs, improvements, and substitutions that you can make to an aquaponic system. I found GardenGirlTV’s version to be the best design for someone like me with limited growing space.
Now, I know I’ve mentioned that my parents are all scientists, but my grandfather is an engineer-turned-geophysicist, and from him I learned to start things on a small scale. I just so happened to have kept my first 5 gallon fish tank (to use as a hospital tank), which I thought would do nicely to help me figure out a good small-scale design that I liked – that may even keep my water from evaporating. I do live in the desert, afterall.

Aquaponics Supplies
Day 1: I first rinsed the gravel. This is très importante as most of the rocks you’ll find produce a dust that will kill your fish. I don’t suggest using marble as I found that as soon as I shake it, more dust is created. Stick to aquarium-grade rocks.

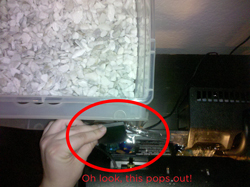
I flipped the bin around and fed the tube thru the hole where the red arrow points to
Day 2: I found a plastic cube to use as a shelf, set my plastic bin on top of it, feeding the attached tubing through a hole in the cube. I was originally going to hang it off the edge, but that seemed unstable. I also poured the marble gravel in to ensure none of it went down the tube.
I then rinsed the Perlite (do NOT use the Miracle Grow kind! It’s slimy with LOTS of residue which contains ammonia nitrate and ammonia phosphates that would kill your fish), added it to top off the plastic bin.
 I then popped out the other hole in the lid, since all the tubing wouldn’t fit on top of the filter.
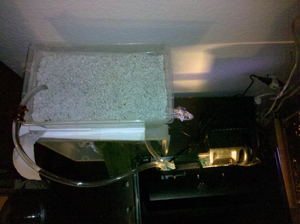
The assembly of the fountain pump was the easiest part. Pop on the adapter, then pop on the tube. Very simple. The harder part was adjusting the pump so that the water would actually go all the way up the tubing and into the bin. I think I ended up putting it on the full strength just to keep it moving. I also timed the water flow, adjusted the tilt height, and got it so the water filled in, ran across, and dropped back down without the water raising higher than the gravel layer. A broken hair clip was used to keep the tube in place.

Close-up of the tubing arrangement.

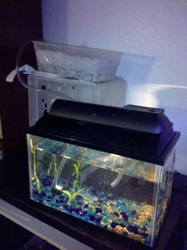
All done!
Full-scale starts on the 19th, so, more then!

